Sunday, December 18, 2016

Idrees Ki Biryani- Lucknow / Authentic Biryani- GOSHT KI DUM BIRYANI

I wanted to give away this recipe a year back but I had not perfected the art of cooking “Idrees ki Biryani” so I pledged to give away the recipe only when I can be testified as a Biryani Culinary artist like Late Mohammed Idrees way back in sixties in Lucknow.

I am a big Biryani lover, so is my family. My Wife and Son appreciate this particular Indian Dish more than anything else since both are accustomed European eater. But they savour Lucknawi Biryani because it has subtle flavors of spices and they don’t Scream out their presence’ and it’s fragrance can bring the neighbors and uninvited guests to your home. 
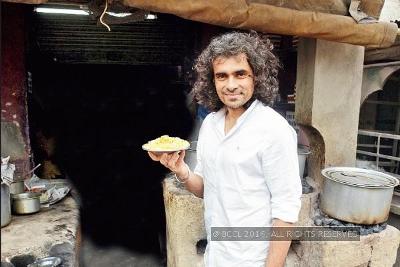
In reality, “Idrees ki Biryani” is my favorite too. As far I remember there has not been a single occasion that I visited Lucknow and I didn’t eat at Idrees. It’s small restaurant in Patanala Near Kotwali in Chowk but you can ask anywhere or anyone in Lucknow, they will give you the proper address. I have not met a single meat lover in Lucknow who had not eaten at Idrees. 

“Idrees ki Biryani” in certainty, is not a genuine Biryani; it’s more like a “Pulao” (Palao aur Pilaf) since rice is cooked in the broth (Yakhni) of cooked meat. However Rice are not fully cooked in the broth so it is kind of Biryani too. Its complicated but it is true. Chefs in Lucknow have perfected the art of culinary simply for two reasons
1- Nawabs had enough money for research and development of cooking 
2- People of Lucknow respected culinary culture more than anything else. 


Cooking Biryani is an intricate process and if undivided attention is not paid, the outcome will fluctuate even if you are using the same method and same ingredients. So as a culinary artist I would recommend two vital ingredients for cooking ”patience and persistence”. Other ingredients are easy to match but these two can only make one a Biryani Chef. 

Lets start the Process, we need these condiments..  


Mutton: 1 Kg (Make sure it’s a male and young goat)
Extra Long Grain Basmati Rice: 750 gm
Red Onion: 2 Big ones
Milk: 500 ml.
Curd- half Cup (optional though recommended)

Ingredients to cook Meat and Broth we need these whole spices. 
Garlic Paste: 2 Tablespoon
Ginger Paste: 2 Tablespoons
Salt: 2 Tablespoon or as per taste
Red Chili Powder: 1 Tablespoon
Black Pepper:  1 Tablespoon
Cloves: 15
Green Cardamom: 15
Black Cardamom (Big ones): 2
Cinnamon Stick: 2
Cassia: 2 1"
Jyfal: half
Javitri: 1 Blade
Fennel Seeds (Small ones): 1.5 Tbsp
Ghee - 1 Cup

Ingredients to finish the Broth (YAKHNI)
Jyfal: 1/2
Javetri: 1/2 blade
Red Chili Powder: 1 Tablespoon
Green Cardamom: 4
Fennel seed: 1 Tablespoon
White Cumin: 1 Tablespoon
Sugar 3 Teaspoon
Fried Onion: 1/2 of the quantity
Saffron: 3 Pinch
Rose Water: 3 tablespoons
Kewda Water: 3 tablespoons 
Whipping Cream – 50 gm

Ingredients to Boil Rice
Salt: 3.5 Tablespoon
Cloves: 10
Green Cardamom: 10
Black Cardamom: 2
Cinnamon Stick: 1
INGREDIENTS for DUM
Fried Onion: Remaining 1/2 of the quantity
Kewda Water: 3 tablespoons
Ghee: 1/2 Cups
Food Color: 1/4 Tbsp


To beign with, Wash Basmati rice twice in clean water and soak it in a bowl for minimum one hour. Slice the onion thin and nice and keep it aside. Heat the ghee in a Degh (copper Vessel) and once heated, fry the onion till it turns into golden Brown. Quickly take it out and keep it aside. Pour half the ghee out in a bowl and leave the rest in the vessel.

Put the flame on High and Put the meat in the oil with curd and all the ingredients, which are above mentioned to cook the meat. In short span of time meat will start turning in brown. This process should be finished in 5 minutes. Then put half a glass of water and cooked it till meat is tender. 
Once meat is cooked take the meat out and pass the broth through sieve to take out all the spices. It should be watery and without any solid spice and meat. 

While meat was almost done, boil the water with the ingredients mentioned above for the Rice. To do the same put the spices in a small bag (Potli) ans put in the water before boiling.  Once you see it boiling put the Rice and cook it till Rice is 75%-80% done.  Pass it through the sieve and keep the Rice aside. 

Take the ingredients (spices) mentioned above to finish the Broth (Yakhni) (except cream, Kewda Water, Saffron and Rose Water) and put them in a grinder and make a vey fine powder of it. Now in the “Degh” put milk and fine powder of spices and half fried onion, cream, Kweda water, Rose water and saffron and cook it for 5 minutes or till you see its water has reduced a bit. Now add ¾ Broth from the meat and all the mutton pieces.  

Now time to put the biryani on DUM. To accomplish this, over broth, put a layer of rice and on the top of the rice put Friend onion, Kewda water and Safforn colour. Cover it with the lid and put the flour dough around it to seal the aroma. Put it on a Dum for 15-20 min and let it rest for another 10 minutes. 

When you will open the lid, its aroma will induce your hunger and you will thank Idrees Bhai. 

Note – Serve it with 1.4 of the Broth we didn’t use. 


-->

Saturday, November 21, 2015

Pan Seared Indian Red Snapper with Roast Sherry Carrots

Pan Seared Indian Red Snapper with Roast Sherry Carrots
Hola Guys !! The last time I had put down a recipe was about 2 years back. Though I didn't stop cooking but I lost the interest of clicking pictures and  writing about it. Recently i realized its important to keep the passion alive. So I am back again…..

This recipe "Red Snapper with Roast Sherry Carrots" is inspired from Billie from Masterchef Australia. However I have made several changes because some of the ingredients are not available in India for example instead of Shallots I have used onions, We hardly get to see fish stock so i used Thai Fish sauce. Secondly i don't believe in copying the recipe, i have yo twist it a bit to go with my style of cooking. 

Here are the Ingredients 

1 Red snapper fillet, please don't remove the skin. 


To make the Broth We need:
1 tbsp olive oil
fish bones and Fish head
2 cloves garlic, roughly chopped 
1 onion, roughly chopped
3 carrots, roughly chopped
1 stick celery, roughly chopped
1 tomato, roughly chopped
1 fennel, roughly chopped
2 bay leaves
165ml  sherry (use mild rice vinegar if not available)
10ml Thai Fish Sauce 
5 parsley stalks
5 dill stalks
80ml cream
1 tbsp butter
5 strands saffron
juice of 1 orange
salt and pepper, to taste  

To make the Roast Sherry Carrots and Fennel:
1 tbsp butter
1 tbsp oil
12 carrots, cleaned and cut into long stalks
1 fennel, quartered
2 tbsp sherry
juice of 1 orange/ Packaged Juice 3/4 cup
salt and pepper, to taste

Method 

To make the broth, heat oil in a large saucepan over high heat. Add fish bones and head and cook until caramelised. Add garlic and onion and cook another 2 minutes. Add carrot, celery, tomato, fennel and bay leaves and cook until well coloured. Deglaze pan with little bit of lemon juice and then with 125ml sherry, cooking until liquid is reduced by ¾.

Add fish sauce, dill water and parsley stalks and allow to simmer until liquid is reduced by 1/3 to about 300 ml. Remove from heat and strain into a clean saucepan.
Place saucepan on medium heat, and whisk in cream and butter. Add saffron, orange juice and remaining 40ml sherry and whisk to combine. Season and set aside, keeping warm.


Meanwhile, to cook the roasted carrots and fennel, heat butter and oil in a frypan set over high heat. Add carrots and fennel and cook until caramelised. Deglaze pan with sherry and reduce until sticky. Add orange juice, salt and pepper to the pan and transfer to the oven to cook until tender, about 5 minutes. Set aside.

To cook the fish, heat olive oil in a frypan over medium heat. Add fish fillets, skin side down, and cook until skin is golden. Turn fish over and continue frying until fish is cooked through, about another 2 minutes.


To serve, place some roasted carrot and fennel in a bowl. Top with red snapper fillet. Pour broth over, dot with herb oil and garnish with fennel/parsley and dill fronds.

Sunday, October 20, 2013

Aglio e Olio with Shrimps

Just got back from the Nation of shopkeepers, England. I was in the UK for 40 odd days for a film shoot. I went to many Italian Restaurants to have my favourite Pasta, Aglio e Olio, but everywhere they serve either tomato-based or cream-based pasta. While I do enjoy indulging in tomato-based or cream-based pasta now and then, the law of diminishing returns often sets in whenever I eat creamy pastas, where I find my enjoyment diminishing halfway through. But for the light-and-fresh-tasting Aglio e Olio, I find that I can easily finish my plate and still left hungry for just a bit more.
So when i got back to India, the first dish I had to cook was Aglio e Olio. It means “Garlic and Oil” in Italian, and one of the simplest pasta dishes to make. This is one dish which I don’t mind drenched in (good-quality Extra Virgin olive) oil. Authentic Aglio e Olio only have a few key ingredients – just garlic, olive oil and pasta, so this is something you can whip up with minimum ingredients.
However, I gave it a twist by adding some veggies and protein with it. I added shrimps, baby corns and zucchini.
The recipe is simple.  All we need is 25 mins and some passion

  • Kosher salt, to taste, plus 1 teaspoon
  • 400 gm spaghetti
  • 3-4 cloves garlic, finely chopped
  • 1/2 cup extra-virgin olive oil
  • Pinch red pepper flakes
  • 2 tablespoons chopped flat-leaf parsley
  • 1/2 lemon, zested, optional
  • Freshly grated Parmigiano-Reggiano
  • 300 gm shrimps
  • Zucchini and baby corns
Bring a large pot of cold water to a boil over high heat, then salt it generously. Add the pasta and cook, stirring occasionally until Al Dente, tender but not mushy, about 8 minutes.
While the pasta cooks, combine the garlic, olive oil, the 1 teaspoon salt, and red pepper flakes in a large skillet and warm over low heat, stirring occasionally, until the garlic softens and turns light golden but before they are halfway through put the shrimps, zucchini and boiled baby corns. cook for another 4 mins on a slow flame
Drain the pasta in a colander set in the sink. Add the pasta to the garlic mixture. Mix well. Add the parsley and Parmesan Cheese. Adjust seasoning, to taste. Transfer to a large serving bowl or divide amongst 4 to 6 dishes. Serve topped with additional grated cheese and parsley, if desired.
TOP TIPS

  • Pasta should be cooked in salted water which is almost as salty as sea water. The cooked pasta will taste salted and this will reduce or eliminate the need to salt the dish later.
  • Al dente is an Italian terms referring to perfectly cooked pasta which is firm (but not hard), and with a slight bite. 
  • Reserve some water from cooking the pasta and add a few tablespoons of it to the final dish. The pasta water not only helps to bind the ingredients, the starch in the pasta water will give the dish a smoother finish.
  • Because you are working with minimum ingredients, the quality of the ingredients will make a huge difference. Go for good quality olive oil and fresh parsley, where possible. Always use fresh garlic instead of pre-chopped bottled garlic.
  • Tip for making perfect golden brown, not burnt garlic: the oil temperature must be just right when you add the garlic, meaning the garlic should sizzle gently in the heated oil when added to the pan (if the oil splatters violently or no reaction when garlic is added, it means the oil is either over-heated or not heated enough).


Sunday, July 7, 2013

Roasted Chicken- Pressure Cooker method

At my birthplace (Allahabad), Barbequed/Oven cooked chicken is termed as “Roast chicken". No matter which class or clan one is from or how much one has travelled, this mistake has never been corrected in times. Once I told my mother and sisters to correct themselves and call it by the proper name. To my surprise, they did correct themselves but only for a day then again it’s back to the same story. 
Sunday Roast
Truly speaking I can’t correct all the people from Allahabad and it doesn’t matter since I don’t live there anymore. 

The trouble with roasting or baking a whole chicken is that it takes a bit of time. Now sometimes that's alright and part of the fun is the longer time in the kitchen preparing a big weekend meal with your family, but sometimes it would be nice to speed things up, and that's where the pressure cooker comes in.

I love roast chicken. The crispy skin, tender flesh, and delicious root vegetables… It’s definitely a delicious meal that yields plenty of leftovers and it's an easy transition to make homemade chicken stock at just about the same time.

Every home cook should have a no-fail recipe for roast chicken, one you can count on to always deliver golden skin and well cooked, moist, flavoursome meat. So what’s the secret? Well, there are several:

Buy fresh Chicken
Pre-Season the Bird
Season Liberally
Dry Skin = Crispy Skin
Don’t Roast a Cold Bird


Ingredients:
1 whole chicken
4 cloves garlic (grated)
1 onion grated
Fresh Parsley
Thyme/Rosemary
Black Pepper powder
Little bit of Lemon juice
Salt
2 Tbs olive oil
3/4 cup fluid: chicken broth or water

Season and Brown
Take the fully defrosted and rinsed chicken and liberally coat the skin with spices and seasonings. Heat the olive oil in the pressure cooker, and carefully brown the top, sides, and bottom of the chicken.

Degalze and add metal stand
Now remove the whole chicken and deglaze the bottom of the pressure cooker with a spatula after adding the water or broth. There shouldn't be much oil in the pan, but you may want to let it cool for a minute or two to lesson the risk of a little too much steam or splashing. Now put in place the little metal stand and the metal platform.

Cook
Cook it for 20 to 25 minutes. First 10 minutes on a high flame then cook it on a slow flame

Open and crisp if you would like
When you open the pressure cooker you’ll see beautiful juices that can be thickened and used to make chicken gravy.
Optional: If you want crispy skin you’ll have to take the cooked chicken, baste it with just a little butter or oil (and if you want - more spices), and oven roast for about 10 minutes at 400 degrees. It will already be cooked, and it won’t take long to simply crisp-up the skin. You can also add the cooked veggies to the roasting pan during this step. We thoroughly enjoyed ours right out of the cooker.

Make stock with leftovers
Wait, hold on. Don't throw away the bones. One of the best parts of pressure cooker chicken is the simplicity of going from "roast" chicken right into homemade chicken stock using all the juices and bones still in the cooker, and then if we want right into homemade soups like homemade chicken soup and a few days worth of lunches. :~)


Saturday, June 29, 2013

Burmese Chicken Curry Khauk swe/ Khow suey

Burmese Chicken Curry khauk swe/khow suey Though as per the Wikipedia page Burma is a historical name for Myanmar but for me it is always Burma. Reason is that as a kid when I read the stories about my Hero Subhash Chandra Bose in my School textbook, he started his army in Burma not in Myanmar. The name of the country is changed but their famous Curry is still called Burmese Chicken Curry worldwide. Since some great countries border Burma so it’s cuisine has a major influence of India, China and Thailand. Khow suey is called Khow Soy in Thailand with a little change in the condiments.
 As you guys know I m a purist so I will give you the authentic recipe of Burmese Chicken Curry. If you search for Burmese chicken curry on Google you will get 2000+ recipes and every recipe has a twist as per the local ingredients available to the chefs. But in my opinion to break the rules you must know the Rules first. So today let’s make Authentic Curry first and then later we can change it according to out taste pallet.   Serves 5 Ingredients  
  • 650 gm / 2 large chicken breast- Cut into bite sizes
  • 2 table spoon Ground nut oil
  • 500 gm Flat Egg noodles
  • 4 cloves Garlic
  • 1 inch ginger
  • 2 small Onions
  • 2 tablespoon Fish Sauce
  • ½ table spoon Shrimp Paste/Fish paste
  • 1 table spoon Chickpea powder
  • 2 cans/600 ml of Coconut milk
  • 3 teaspoon spoon Turmeric
  • 1 table spoon Paprika/Red chilly powder
  • Couple of wedges of Lemon/Lime
  • Salt to taste
 For the Topping
  • 1 Fried onion Flakes
  • 2 Chopped Spring onion
  • 1 Lemon cut into wedges
  • Coriander
Process Cook the noodle as per the instruction given on the noodle pack and immidieatly put it in cold water. It stops the process of cooking and this method keep is moist.
My Burmese Curry
Marinate the cheek with 1 tablespoon of Turmeric and 1 tablespoon of fish sauce for one hour.
Cut the onion roughly, Bang the garlic lightly, and cut the ginger in to small pieces. Pound them in a Mortar and pestle to make a paste or else you can also grind them in a blender.  Heat the oil in a pot and put the paste with the rest of the turmeric. Let is brown nice and golden.
Now put he chicken in it and mix it well with the paste. Paste should be dancing around the chicken.  Sauté it till Chicken is nice and golden and sauce has started sticking to the bottom. This is very important because this where all the goodies come from.  Put the Paprika/chili powder, rest of the fish sauce, and put little bit o water and half a can of coconut milk. It will release all the goodies that are stuck at the bottom of the pot. Lower the heat and cook it till the chicken is absolutely tender.  It’s ready when the oil comes to the surface. It means most of the liquid has evaporated.  At this point put the rest of the coconut milk and chickpea powder.  Give it a nice stir. Now wait till the juices come to boil.
 To serve take 5 bowls and put the noodle. On top of the noodle put curry and garnish it with the accompanied condiments.

You can buy the shrimp Paste from Zansaar http://www.zansaar.com/tra-chang-shrimp-paste-400-gm-p-SHRVXY110?gclid=CNnKy7zeiLgCFUcm4godlhkAYw